Even though we appear to be in week 3000 of lockdown I am still struggling to get flour, who is doing all the baking? So, today I made flourless banana pancakes for the children. Although since my daughter has been going smoothie bowl bonkers (I blame Instagram), bananas are also few and far between but I managed to nab the last one.
We have started buying our fruit and veg from Mead Open Farm Drive Through we honestly love it. A full extensive list is at the start, you order and pay from your car – the staff hold a contactless machine on the end of a long pole – and then you drive through the farm to wait while they pack it. The staff come and place your order in your boot so there is no need to leave the car. They have also started doing pizzas and coffee! As you wait you get to sit and chat (this may just be me) to llamas and baby goats. It isn’t quick and it is pricier than Aldi etc but I feel I am supporting the farm which may otherwise not have the funds to look after the animals.
The recipe for flourless pancakes is very simple and as my son pointed out after he had demolished them – they are basically sweet pancakes.
Ingredients
1 x large banana (the more brown patches the better as it means it is sweeter)
2 x eggs
Step 1
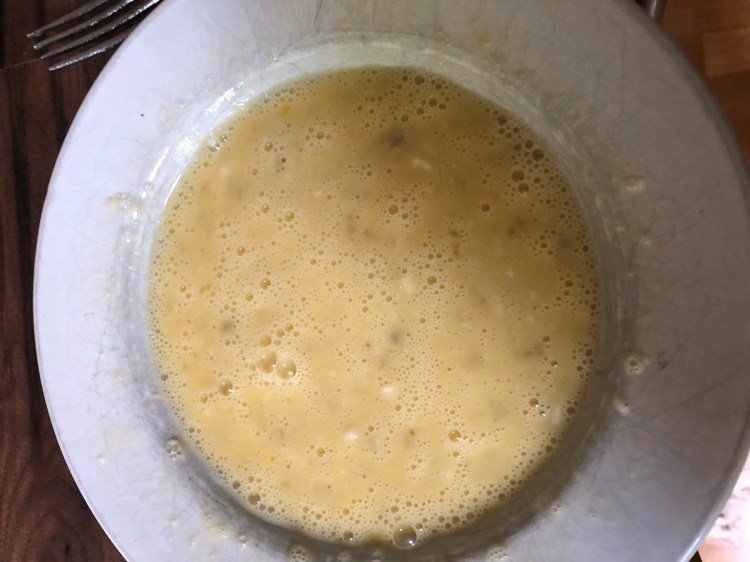
Mash the banana with a fork in a mixing bowl. Add both eggs and whisk
Step 2
Melt butter in a frying pan and spoon in a couple of large dollops of the mixture. It needs’ to almost set before you turn it, so keep an eye on the bottom of the pancake so that it doesn’t burn – adjust the temperature on the hob as required. Using a spatula, carefully flip the pancakes over and cook the other side.
Step 3
Add toppings and eat – personally I do not think they need toppings but my family disagree.
Let me know if you enjoy them and if you manage to get to the drive-thru
Today’s recipe has no science discussed or any clever skills needed, it is just lovely and comforting. It is taken from Nadiya Hussein’s book and it is easy and fabulous. You may know Nadiya from Bake Off fame which then sparked off her own TV series and a couple of recipe books. I like her because she is a working mum and her recipes all contain ingredients that are recognisable; believe me I have a fair few that do not. A few of my recipe books are one step away from requesting powdered dragon breath..
Cheese and Ham Twist
Ingredients (serves 4 portions)
1 x pack ready rolled puff pastry (the original recipe calls for two but it is huge when made)
Ketchup
Pack of sliced ham (about 8 slices)
Approx 100g cheese but up to you.
Method
1. Preheat oven to 200 degrees C
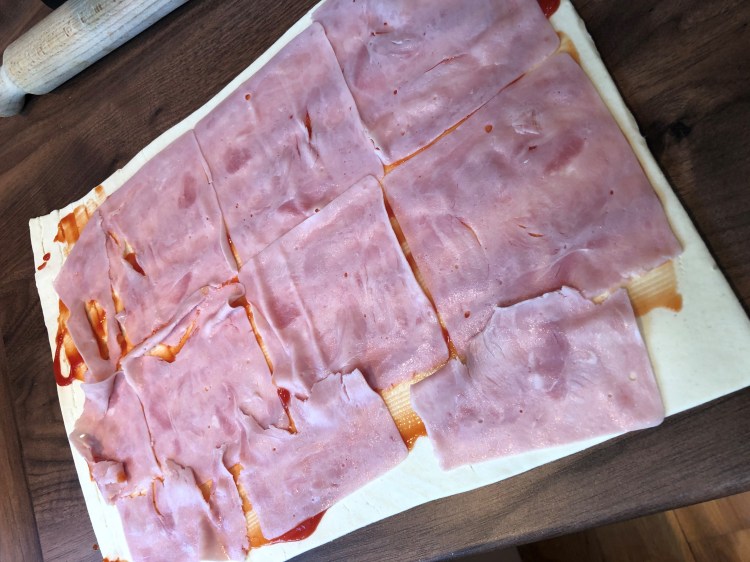
2. Unroll puff pastry and place onto greaseproof paper. You can roll it out a tad to make it bigger. If using two, join them at the short end by pressing together gently.
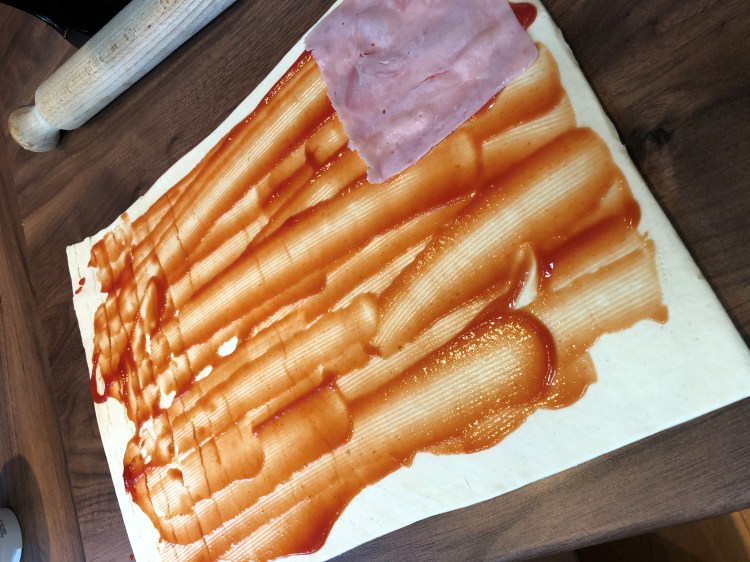
3. Spread ketchup all over the puff pastry.
4. Cover with sliced ham.
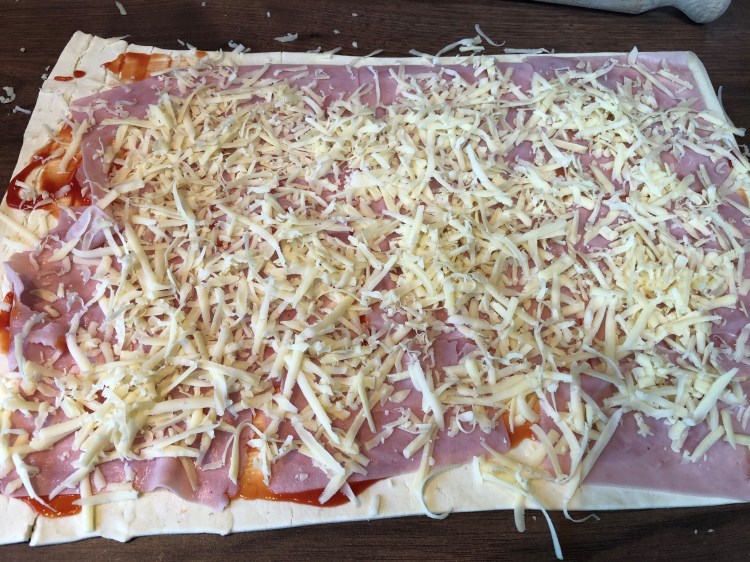
5. Sprinkle cheese over the top
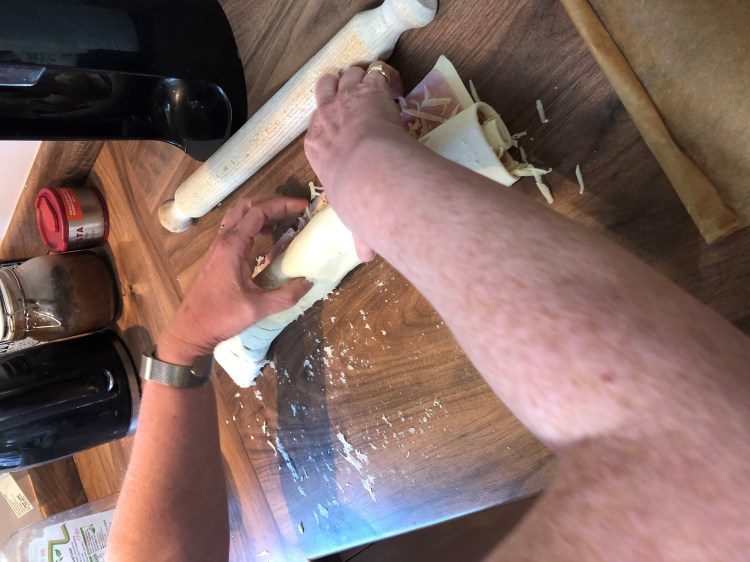
6. Roll up tightly from the long edge. This can be a bit tricky as it may have stuck down slightly. Just take it slowly. Don’t worry if you get the occasional rip – it all tastes the same in the end.
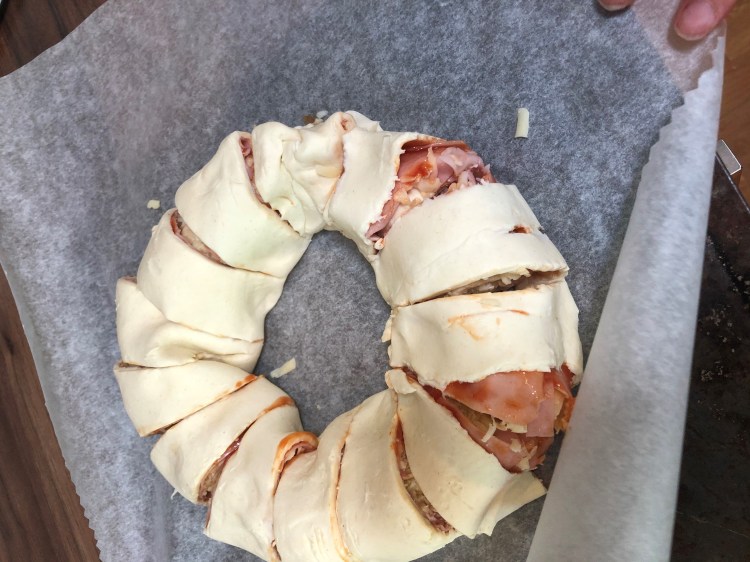
7. Bring the two ends together so that it is in a circle. Then place with greaseproof paper onto a baking tray.
8. Using a large serated knife cut 3/4 of the way through in 1 inch gaps. See below photo.
(okay my inches are accurate)
9. Twist each section out so that you can see the spiral, this is harder to do then it says and mine always looks a bit messy. My family do not care though and it never lasts long enough for anyone to bother with the aesthetics.
10. Bake for about 20-25 minutes until golden.
Serve as a snack or as a main meal with a large salad or veg.
A twist on this would be to make it like a pizza and add varying toppings.
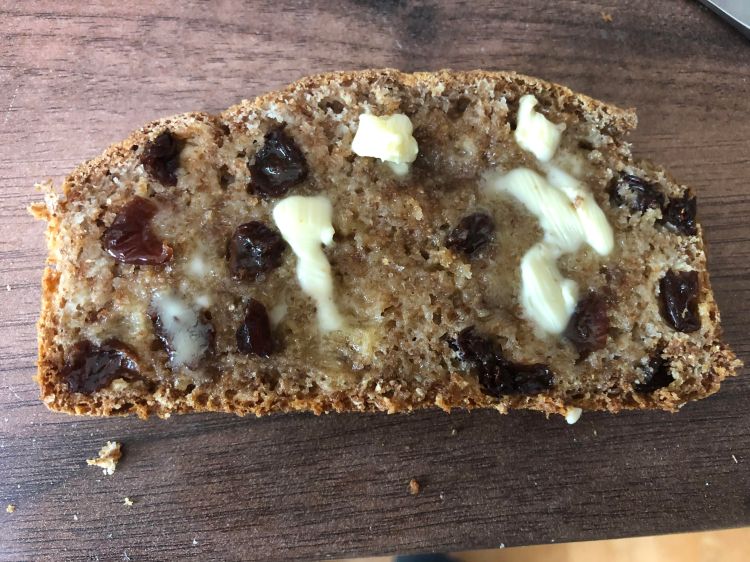
This is an ancient recipe that I have been eating for as long as I can remember. Mum used to serve it up warm with an inch thick dollop of butter smeared across the top and melting at the edges. She apparently found the recipe on the side of the cereal box and I have been making it for my kids since they can remember. It is basically a type of tea loaf and is suprisingly light in texture and has so much flavour. My son likes it with butter, my daughter without and my husband would eat it in one go.
It is incredibly easy to make, the only measuring tool you need is a mug (you decide on the size) and there are no eggs. I do not believe that All Bran is going to be stock piled any time soon, so hopefully you will have no difficulty in buying a box and it is a fab way of getting fibre into the kids. Any dried fruit will work and my mum has even made it with tinned apple when she had no raisins; cherries would be good.
Ingredients
1 mug All Bran
1/2 mug sugar
1/2 mug dried fruit
1 mug milk
1 mug self raising flour
1 x loaf tin
Preheat oven to 180 degrees C
Method
1. In a bowl put the cereal, fruit, sugar and milk and stir. Leave to soak for 30 minutes.
Before soak
Before soak
After soak
2. After 30 minutes stir in the mug of flour
3. Tip into tin and cook for about 45-50 minutes or until skewer comes out clean.
I did not have a photo of the loaf straight out of the oven as my son had ripped into it immediately. It is delicious hot with butter but also really lovely cold. Let me know how you get on.
A couple of years ago, the technology department took 30 food students to Borough Market on the southbank in London. The market is vibrant, bustling, exotic and varied and you can get anything from a simple onion to some blue brain cheese – apparently the mouldiest cheese in the UK. The students loved tasting the different paellas, smelling truffles and being out and about in a trendy area of London. I take my children there at least once in the holidays (back in the days when we were allowed out) and they love fish finger sandwiches and roast potatoes from Roast takeaway, eaten whilst sat on the curb on the outside edge of the market.
On this school trip, we attended a workshop at Bread Ahead bakery. They are absolutely famous for their doughnuts and the queue is always huge outside the bakery, but soooooooooooooooo worth it. Light, fluffy dough filled with homemade raspberry jam or salted caramel and then rolled in sugar; they are a delight. The students were there to make soda bread and this was done in a huge workshop space at the top of the commercial bakery. Soda bread requires no yeast, no kneading and its magic lies in the simple chemical reaction between acid and alkaline.
It has a very different texture to other breads because it does not have the large bubble formation created when yeast is used. Yeast needs to ferment as mentioned in a previous post. This fermentation process produces carbon dioxide and, as the yeast keeps multiplying over time, more air is produced. This air is distributed when we knock back the dough and reshape; thus creating an even crumb.
Soda bread ihas a denser texture and isn’t everybody’s taste, however it is a simple bread that can be made from start to finish in just over an hour. I love it. The carbon dioxide is created when the alkaline (bicarbonate of soda) is mixed with the acid (buttermilk). If you’ve ever used a kid’s volcano kit at home, you have seen the reaction. When you tip vinegar (acid) onto bicarbonate of soda (alkaline) the reaction is immediate and all the bubbles froth over the top. This is what happens in this recipe. However, unlike yeast which keeps multiplying, the formation of bubbles stops when all the acid has reacted with all of the alkaline – so time is of the essence, hence the speediness of the recipe.
The dense texture is also caused because we do not knead the bread (this would knock those precious, delicate air bubbles out). The gluten structure is therefore limited. Right, science over and done with now; HONEST.
Ingredients
450g plain flour ( I used brown as I had some in the cupboard_
50g oats
360ml buttermilk (my pot was less than this so I used some extra water). If you cannot get buttermilk you can add lemon juice to milk or combine milk and natural yoghurt.
6 tablespoons of warm water
1 teaspoon bicarbonate of soda
1 teaspoon of salt
1. Put all the dry ingredients into a mixing bowl.
2. Add the wet ingredients (fill the buttermilk tub up with the water so you do not lose any of the acidic goodness when adding the water required).
3. Quickly mix together
4. Shape into a round and place on a baking tray, either on top of some flour, greaseproof paper or a silicon sheet
5. With a bread knife score the top and slightly spread open. This is to allow the rising to occur.
6. Bake in the preheated for 45 minutes. After 45 minutes, take out of the oven turn over and place back in for another 15 minutes.
7. It should sound hollow when it is cooked.
8. Leave to cool before slicing – or as much as you can. This will help prevent it squashing.
Before being turned over
I would love to hear about any of your successes or recipes that you would like to have explained.
Who doesn’t love an eclair or a profiterole? Shiny crisp pastry with a magical hollow centre filled to bursting with cream or custard then dipped in chocolate. Pastry comes in many forms and the difference is in the ratio between butter, flour and liquid. This one variation (the ratio) makes the difference between a luxury flaky pastry, layered puff pastry or the buttery goodness of shortcrust.
Choux is one that seems impossible unless you are really skilled and so lots of people are too scared to try. The following recipe if followed to the letter will work; I promise.
Apologies for the quality of the photo I was cooking dinner and shouting instructions to my daughter as she made these.
Ingredients
125ml water
50g butter
50g plain flour
1 large egg (have a spare one as the quantity of egg needed can be changeable)
500ml cream
chocolate of choice ( avoid white as it is tricky to work with plus too sweet – I used dark)
Weigh out the flour and place in the middle of a folded peice of greaseproof paper or just paper and put to one side.
In a pan pour the water and add the butter. Bring to a rolling boil. A rolling boil is when every bit of the surface is bubbling, the choux will fail if the water is not hot enough. When the water is bonkers bubbling, ensure that you have a wooden spoon to hand. The next step is the vital bit
Tip the flour straight into the centre of the boiling water, take the pan off the heat and IMMEDIATELY start beating well with the wooden spoon. It will combine and then should hopefully start to come away from the sides and form a dough in the centre of the pan. You can put it back on the heat for a couple of seconds whilst beating if there is still wetness at the bottom.
Tip the dough into a bowl and leave to cool to room temperature.
Preheat your oven to 180 fan and place greaseproof paper on an oven tray. If you have a piping bag get this ready
In a small bowl crack the egg and beat with a fork.
When the dough has cooled, slowly beat in the egg A BIT AT A TIME. The mixture will look curdled to start with but then will start to change to a thick paste. Keep beating, do not be gentle at this point. Keep adding the egg until it is a slow dropping consistency. To test this hold the wooden spoon with some mixture up above your bowl, it should stay on the spoon for a count of three seconds before dropping off.
It should just need 1 egg but you may need to add a tad more.
Fill piping bag and then pipe small rounds onto your tray, leaving gaps between them. Wet a finger with water and gently pat down the tops of each round. Fill half a glass of water and just after opening the oven door, tip this into the bottom of the oven to create steam. Place your choux in oven. These should take approx. 20 minutes.
When golden and hollow, take out turn upside down and prick a small hole in the bottom of each one. Place in the now turned off oven with the door open to dry out. Then cool.
Using a hand whisk, whisk the cream until soft peaks form. You want it to hold its shape but you don’t want it to be on the verge of turning into butter. A hand whisk is hard work but will prevent you from whisking it too far. Put to one side.
In a microwavable bowl, place the chocolate broken up. Blast in the microwave, checking every ten or so seconds and stirring. Chocolate can sieze really easily so ensure you stir every check and remove fully when there are still solid bits in as residual heat will melt these.
My daughter piping
Clean out piping bag if reusable or get a new one and fill with your cream. Take each choux bun and carefully poke a hole in the side just big enough to fill with cream. Pipe cream in the centre of each one.
Carefully dip each bun in the melted chocolate
Enjoy.
These can be filled with all manner of gorgeousness, the variations are up to you. If you scale up the mix then ensure you keep the ratio the same. No guessing or judging when it comes to baking. Love the food, respect the science.
As people decide they are going to bake their own bread for fear of shortages (which are not really there), the shelves are low or completely bare when it comes to bread flour. However, the following recipe from James Morton’s Brilliant Bread works perfectly with normal plain flour; use white though as wholemeal flour is a whole new method.
The structure of bread comes from the protein found in flour – gluten. Gluten is a magical beast and when baking, depending on the recipe, bakers are either encouraging its formation or trying to prevent it; shortcrust pastry is a good example of gluten prevention techniques. Kneading in breadmaking is all about stretching the gluten strands, the more you knead the greater the scaffold you create which traps the air when cooking. However, gluten is also activated when liquid is added to a recipe and so the following recipe works because you are giving the protein time to do its magic with the odd bit of reshaping. The end result is a more open texture than your average shop bought loaf, but it is unbelieavably soft and moreish; so far this loaf has lasted on average half an hour before being completely demolished in this house.
Fast action yeast is used here and this is available everywhere, either in sachets or tins that you can spoon out. Fast action yeast works immediately the liquid is added and begins to ferment. Thats right, it does produce alcohol during the proving process which explains the beerlike aroma. Unfortunately though this alcohol is lost during cooking. Sorry. Yeast is a bacteria and so therefore needs the following to multiply – time, moisture, food and warmth. This recipe gives it plenty of time, the moisture and warmth come from the warm water and the food is supplied by the glucose present in flour. As it ferments carbon dioxide is produced and this is where the magic happens. The activated gluten strands provide a scaffold that traps in the gas bubbles during the proving process. When cooked, they are stablilised in the dough (gelatinisation of the starch within the flour) with the end result being the bread texture we all adore.
Recipe
500g Plain or Strong flour
1 sachet or 7g fast action yeast
7g salt (normal table)
350g tepid water
(James’ recipe asks for 10g salt but I find this too salty)
Stage 1
Dry ingredients – add the flour to a bowl. On one side add the salt and to the other add the yeast. Mix into the flour on each side not letting the salt and yeast touch other as salt kills yeast
Stage 2
Add the warm water to the dry ingredients and mix until it forms a dough. Use the dough to scoop up any dry flour around the bowl.
Stage 3
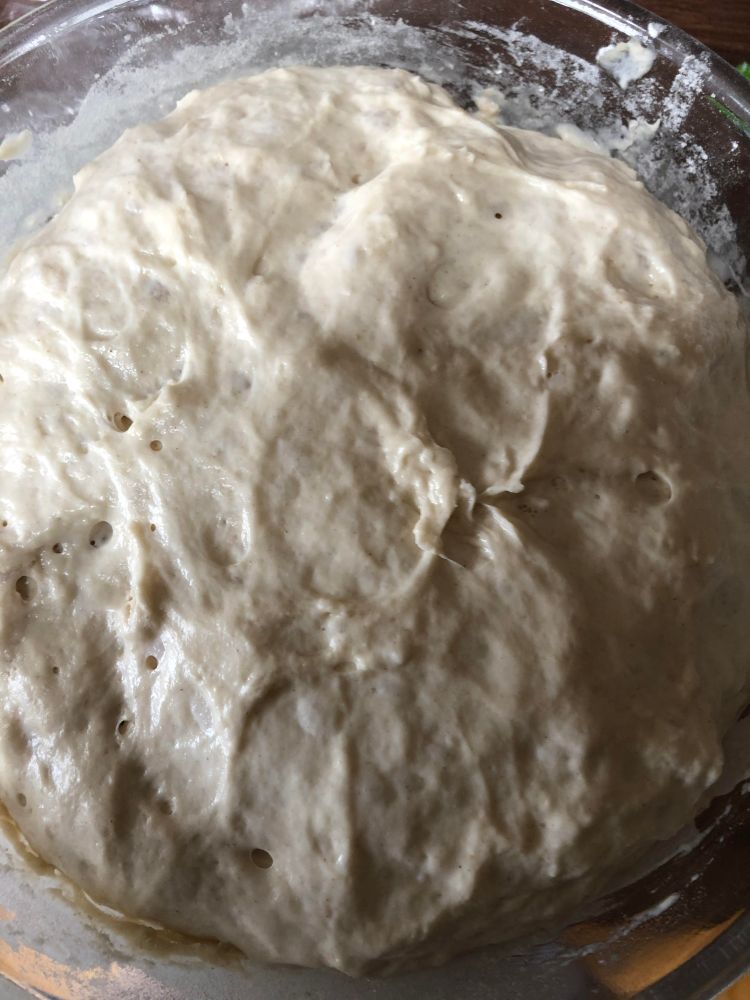
Cover with either a dampt tea-towel or clingfilm and leave to prove for 40 minutes in a warm place.
After provingBefore Proving
Stage 4
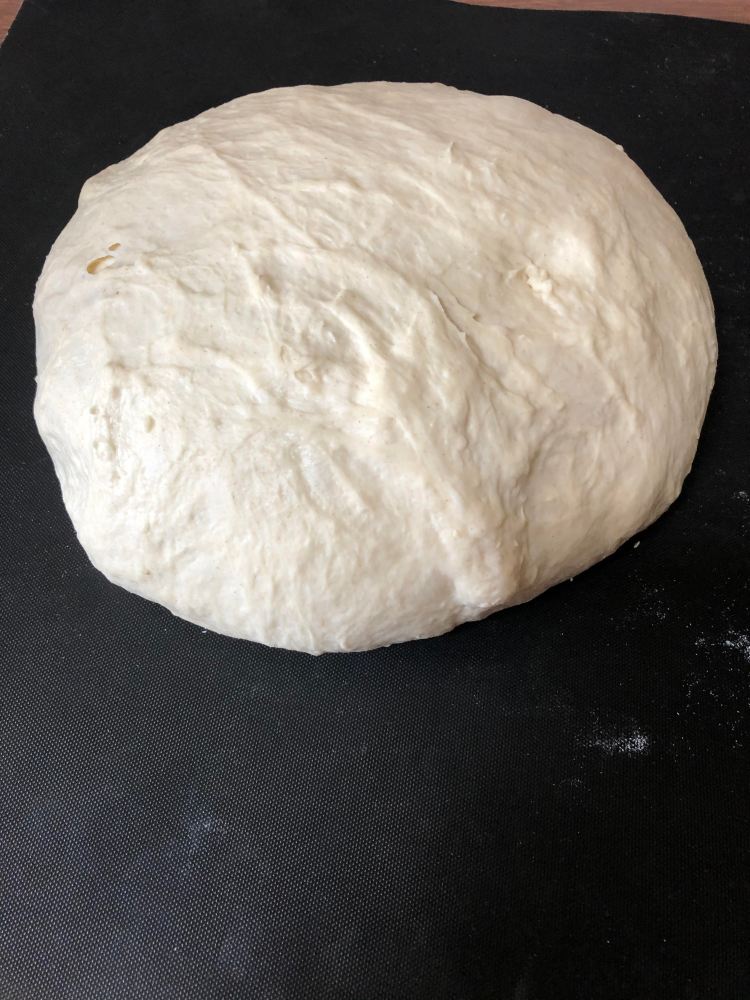
With a wet hand scoop down the side of the bowl and fold the dough into the middle from one side. Repeat turning the bowl a 1/4 turn each fold. Cover once more and leave to prove for another hour in a warm place
after second prove
Stage 5
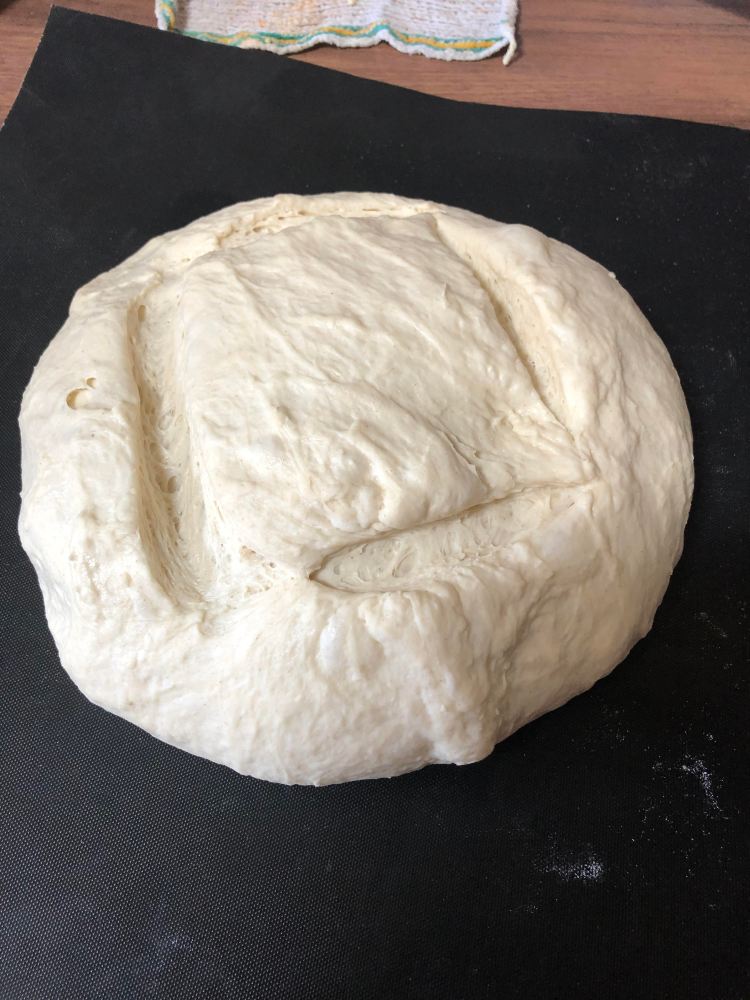
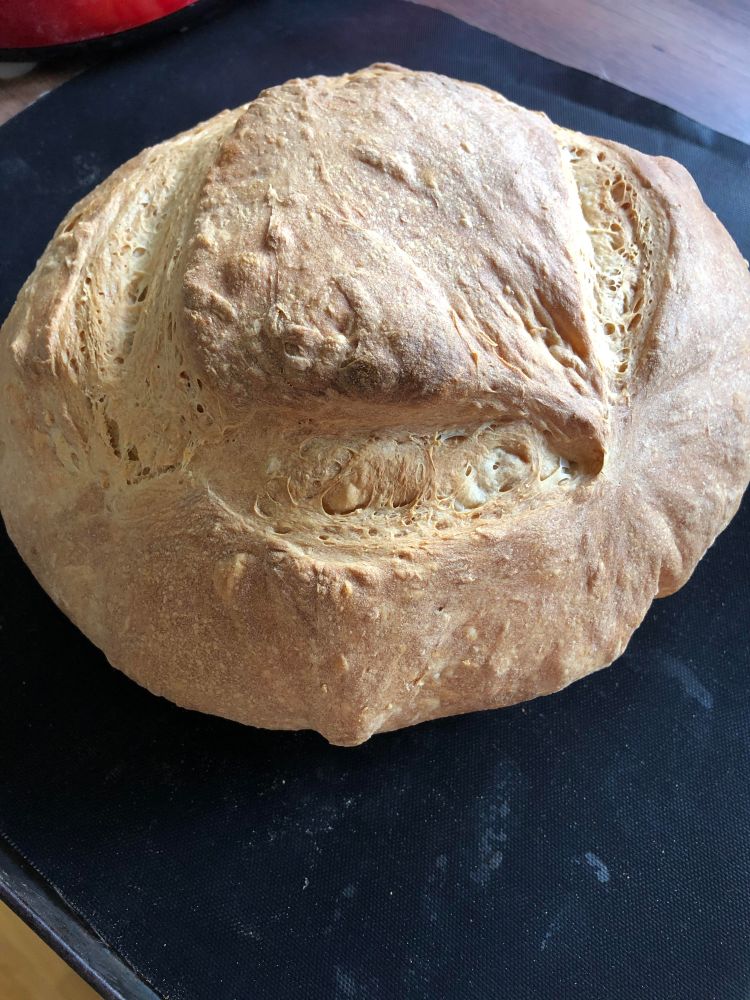
Shape into final desired shape, I chose a round shape. Place dough on a lightly floured surface and with floured hands stretch the dough by taking a side in each hand and gently pulling. Fold the ends into the middle, turn the dough and repeat. It should feel tighter after a couple of goes. Then turn the dough over and with cupped hands, shaped into a round.
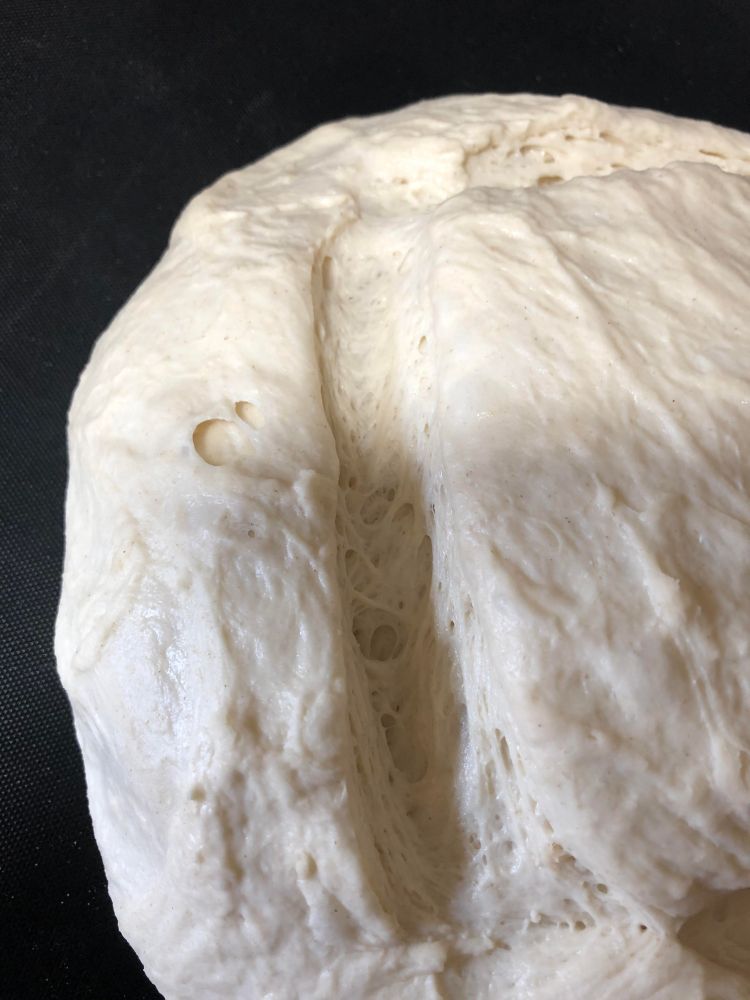
This now needs its final prove. Flour a baking tray and place the dough onto the tray. I place the tray inside a large carrier bag so that there is plenty of space over the dough (otherwise the dough sticks to the bag). Leave for another hour and preheat the oven during this time to 210 C. By the end of the hour the dough should have doubled in size, this can now be scored with a sharp knife before placing in the oven to bake for 40 minutes.
shapedafter final provescoredbubble magic
Once out of the oven, leave to cool as much as you can for the best texture when sliced. This stage is tricky in my house as my kids can be fast asleep in bed but still know that the bread has just come out of the oven.
If you love the baking of this bread then please say so. I will be giving my feedback on a lot of James Morton’s recipes but also sharing some foolproof recipes for choux pastry etc that I use at school.
As we are all stuck here in lockdown with an ever-expanding vocabulary that now includes self isolation, social distancing and lockdown as every day phrases, I have revived my obsession with bread baking. Bread is the first thing to sell out in any shop – should you be lucky enough to get out to one. It is also the one thing that my teenage children want to eat on a daily basis and as they are stuck in the house constantly – apart from the now daily, compulsorary games of netball on the driveway – the eating appears to be constant.
Baking bread is something that seems so easy from a distance as it only requires flour, yeast, water and salt for flavour; yet it is so easy to end up with a brick. You can watch all the youtube channels you like but somehow the soft texture centre of the loaf can end up resembling the stuffing they use for sofas and is just
as chewy. Incidentally the Italians call the middle part of a slice of bread, la mollica – from mollare, to give up! A successful loaf requires basic understanding of the science behind the interaction of the basic ingredients. Once this is nailed then successful bread is yours.
I am a 47 year old teacher and qualified as a teacher in my 40s – as midlife crises go it was quite dramatic and actually more painful than my other crisis which was to take up roller derby. Funnily enough, along with English Literature I teach food science! Baking is chemistry and the best recipes I have got have been from food science books and it is always these basic recipes that I share with students.
So, during my time away from the madness of the classroom whilst we stay at home and do our best to keep us and our loved ones well – because actually nothing else really matters above that – I am sharing my love of baking to keep my active brain occupied – Bring on the elasticated trousers.


 On this school trip, we attended a workshop at


 Apologies for the quality of the photo I was cooking dinner and shouting instructions to my daughter as she made these.